Re-Rooting My Poppy Parker Doll-Stage 1, Color Choice

I have had the Poppy Parker from the Barefoot In The Park, The Bratter Lover's set for a while now.  I love the Poppy Parker sculpts just by default, but I do have a preference for the ones with very dark brunette hair, and definitely the ones with bright red hair.  

I know I will never be able to get my "grail" Poppy Parker red head, which is the Sweet In Switzerland, but I think I can get pretty close to it myself.

I just have to be brave enough, and patient enough, to do a full re-root on my Bratter Lover's doll.

upload.jpeg

First step was getting the color I wanted.  I went to tried and true RestoreDoll.com, and went straight for the Katsilk Saran section.  I have done partial re-roots on dolls years ago, and this was the hair I used.  The price is right, shipping is reasonable and very quick, and the customer service is exceptional.  What I really love about them is their willingness to make a custom blended hair color.  The color I went with is a blend of More Titan, Mahogany, and Grant A Wish.  The fact they are willing to make a custom blend with a color that's already a custom blend is what puts them over the top for me.

upload.jpeg

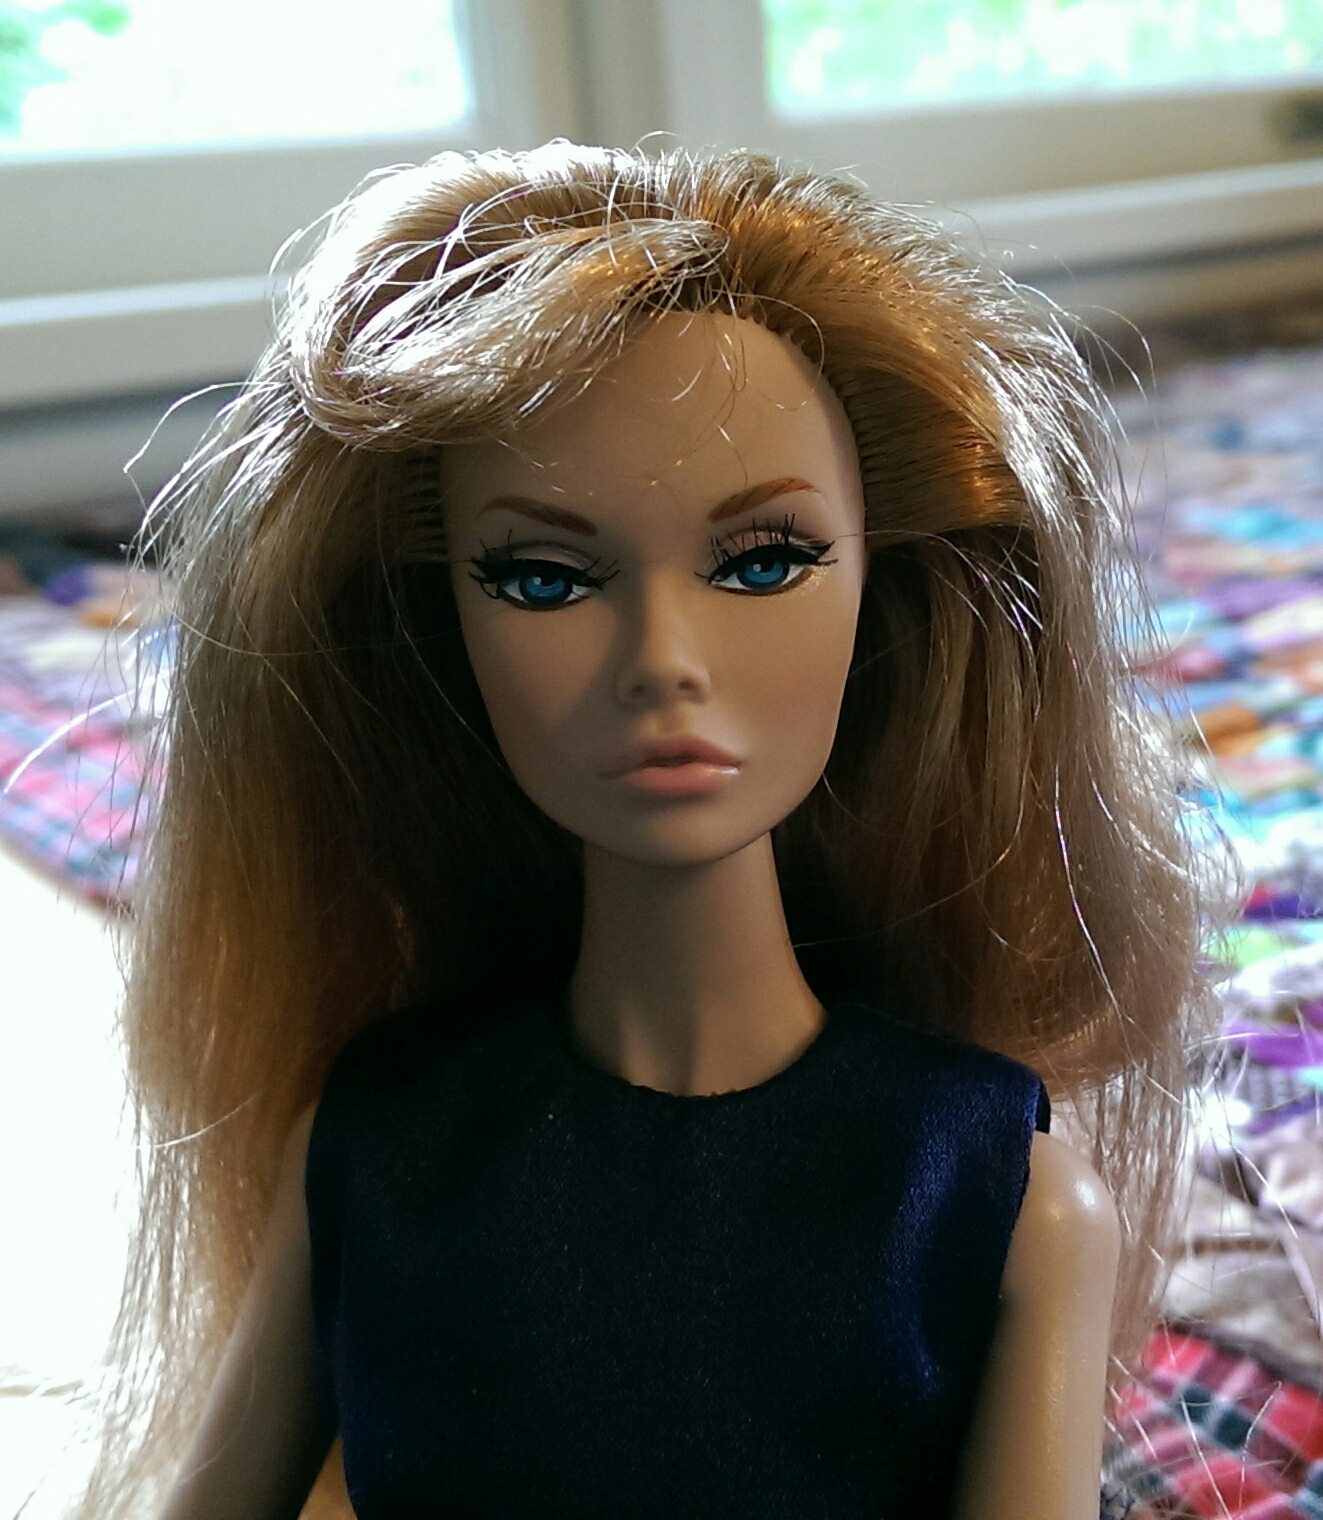
The Bratter Lover's doll has a strawberry blonde color, with bangs.  I've never been a fan of bangs on my dolls, most likely because of some deep rooted childhood issues involving my mother.  I know this is a doll meant to look like a character, and as far as bangs go they look alright on her.  But I just haven't been as happy with her as I know I should be with a Poppy Parker doll.

So, she will become a red head, without bangs, and hopefully will not end up permanently damaged by my efforts!  All my re-roots before didn't require me to remove the doll's head.  This one will.  I will be watching a lot of tutorials first before I take that step!

upload.jpeg
upload.jpeg

Cats And Dolls

StevenMonster_Sofia_081315_2.jpg

Steven Monster is a pretty laid back cat, at least when he's sleepy.  As a result, I can't resist the urge to prop up my dolls against him when I am in the mood to fiddle with our cameras.

I wanted to get a good shot of the cute sloth print t-shirt I purchased from Dollheimr on Etsy.  Steven Monster happened to be laying in one of his many "usual" spots, so he got drafted to participate.  :)

The shirt is a perfect fit on my Bambicrony Lottie doll, Sofia.  I did have to remove her head to get the shirt on, but fortunately that is an easy thing to do with this BJD.

The seller is in France, so the journey across the ocean takes about two weeks, but as you can see it is well worth the wait!

StevenMonster_Sofia_081315_1.jpg
StevenMonster_Sofia_081315_3.jpg

Choose Your Waste Yarn Wisely

I am still working on the twelve inch fashion doll sized Woodland Hoodlet. I had a bit of frustration after I got done with the front.

I really chose the wrong yarn for my provisional cast on. For this size, especially holding laceweight yarn double, I should have immediately transferred the stitches to another needle, ready and waiting for the Kitchener stitch seam.

I used a light colored yarn, which was not very firm. It was smooth, but it still stuck to my stitches.  Plus, there was not enough color contrast between the waste yarn and the working yarn. 

Fortunately I was able to get the stitches off the waste yarn, and after the seam was completed it still looks good. There was a bit of colorful language as I fought to see each of the 44 stitches against the white waste yarn, but my cat was the only witness.

So lesson learned. High contrast in color, and stick to cotton for my waste yarn. And I will also seriously try different provisional cast ons. Just one method clearly doesn't cut it.

Now I just need to find my set of size 0 US DPNs and I can get the hood started! 

Laceweight yarn held double on size 0 US needles. The front and back is done, and seam done. 

Laceweight yarn held double on size 0 US needles. The front and back is done, and seam done. 

A shot of the back.

A shot of the back.

Here is what it looks like turned inside out. 

Here is what it looks like turned inside out. 

The Effect Of Cables On Knitting

I am still on a Woodland Hoodlet kick.  The version for 12 inch fashion dolls is still in progress, but I decided to cast on a new one that will fit 10-12" dolls (like Tonner Patsy, and my Bambicrony Lottie) and 16" fashion dolls (like Tonner's Sydney).

With this latest version I decided to take some pictures of the beginning.  I find it very interesting how the fabric of knitting is impacted by the pattern/stitches.  Cables especially have a huge impact.  They provide a lot of texture and visual interest, but they also affect the size.  When you're talking about huge cables, such as the twelve stitch ones in the Woodland Hoodlet pattern, you really see the impact.

The first picture is with the setup rows only completed.  It's three rows of basic stockinette, then two rows introducing the knit and purl pattern that sets up the cables.

I laid the fabric down without stretching, and we have seven inches in length (or in the case of this pattern, "height", since we are knitting the front section back and forth.)  If I were to knit this without adding cables, this would be way too big for my target doll, and sloppy on top of it.

Size 2 US needles with Loops & Thread Woolike yarn held single.  There are only knit and purl stitches so far.

Size 2 US needles with Loops & Thread Woolike yarn held single.  There are only knit and purl stitches so far.

Next we have the project with the first four row repeat completed.  The pattern uses short rows, so we are just beginning to start the shaping so that the neckline/top will be narrower across than the hemline/bottom.  We have also introduced the cables and bobbles.

We have introduced two sets of twelve stitch cables, plus a six stitch cable at the beginning of the four row repeat, and a four stitch cable at the end of the four row repeat.  Otherwise all stitches are basic knit and purl.

Adding these cables has shrunk the fabric from seven inches down to four inches.  We have lost three inches of fabric!

This is pretty dramatic just in a doll scaled knit.  When I knit the adult medium, the impact of the cables was even more so.

After the first four row pattern repeat.  Several cables have been added, shrinking the fabric dramatically.

After the first four row pattern repeat.  Several cables have been added, shrinking the fabric dramatically.

I tend not to knit test swatches for my doll knits, since I figure whatever I end up with will fit at least one of the dolls in my collection.  But if I ever decide to knit an adult sweater, especially one with cables, I will definitely take that extra time.  I will even knit two versions, one with basic stockinette, and one with the cable pattern.  Unlike my dolls, I wouldn't feel too happy about having to hand off a sweater I put in hours/weeks/months into and have it not fit my intended recipient!  :D